
This device is great to custom build your own router system. It's cheap, runs Linux with several different firmware distributions available, excellent Broadcom compoments and it's relatively stable/reliable compared to quality commercial products. You can virtually do everything you want with it, i.e. just put on a more powerful version of the stock firmware, increase the signal power output, make it your primary router with 5 VLAN configurable ports (v2 hardware), make it a node in an advanced WDS mesh network, wireless client connected to regular access point, ad-hoc networking, integrated captive portal for wireless hotspots, dedicated lan router and probably a lot more.
List of available firmware distribution:
There are a hole lot of other branded routersa that's based on the Linksys WRT54G, see the list compiled by Seattlewireless users.
There are two main hardware versions, v1 and v2. The major changes are listed below.
v1 hardware
|
v1.1 hardware changes
|
v2.0 hardware changes
|
v2.2 hardware changes
|
Data Sheet Manual WBR-G54_2.20_1 firmware
|
|
The WBR-G54 has all the expected features but it strengths is the extensive stock syslog logging, packet filtering and alerting capabilities.'
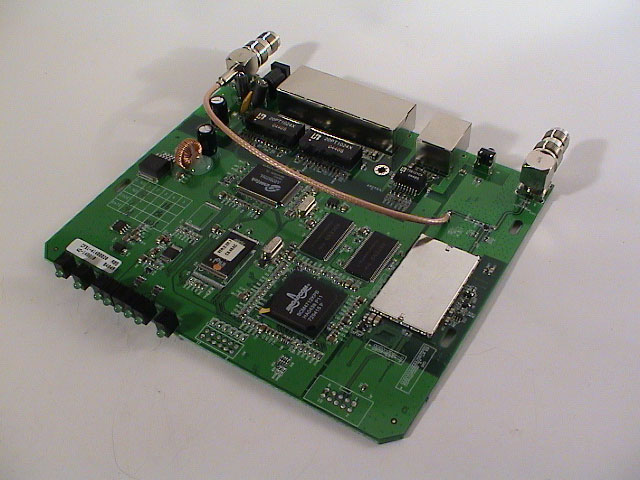
Device information:
It's recognized as v1 hardware, but the vlan configuration (vlan0, vlan1) doesn't seem to come up properly. The DIAG led will light when booting and turns off when the system is loaded.
Default network configuration:
View the kernel dmesg log here.
Tutorials:
 |
 |
 |
The WRT54G is probably the base architecture that of most of the branded routers (Buffalo, Siemens, Belkin, Asus, etc) license and operating systems (OpenWRT, Sveasoft, HyperWRT, etc) support.
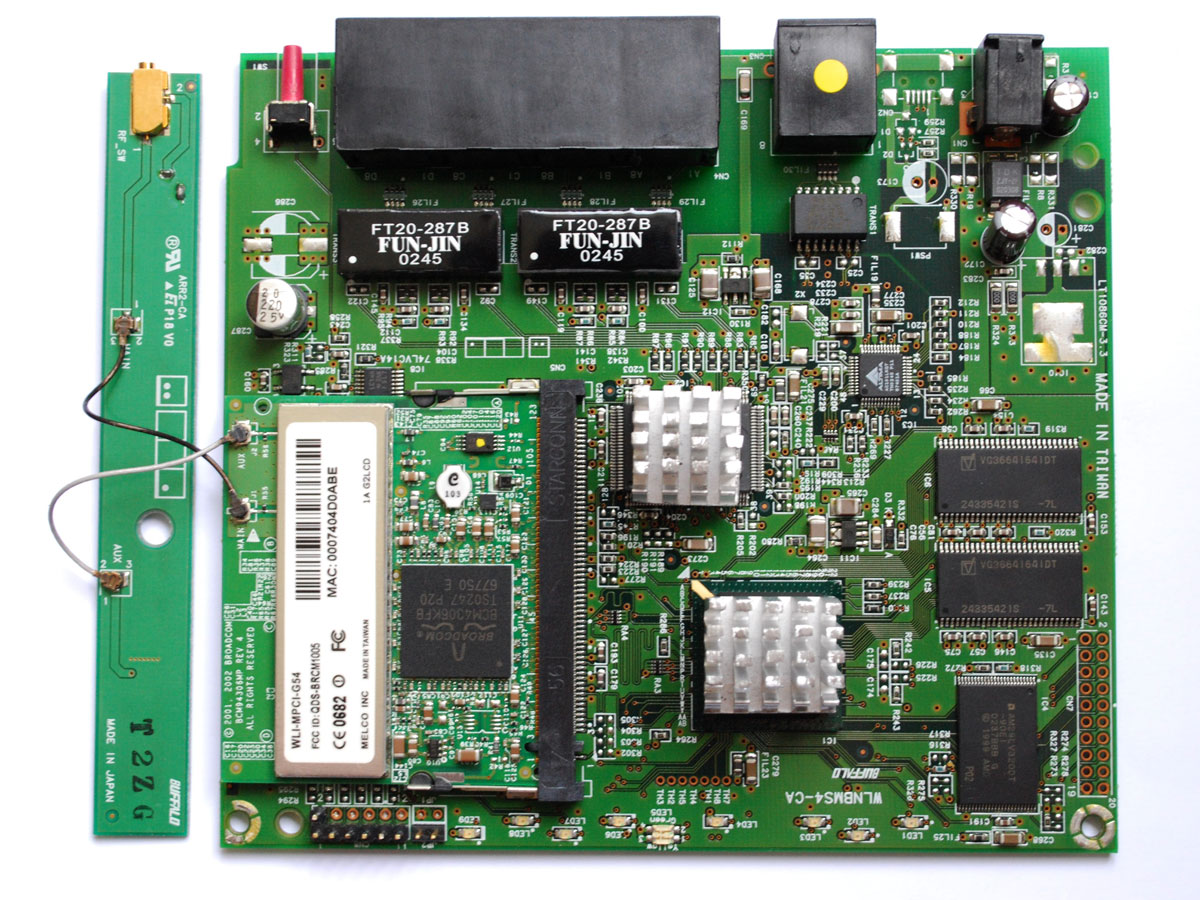
Device information:
The unit I got is recognized as v2 hardware, I bought it December 2004. The ethernet controller is eth0 and the wireless controller eth1. And with the new v2 ethernet driver you can independant specify VLAN's, enabling you to either have 5 independant (port0-4) interfaces/vlans or one big switch unit, or a nice combination of both.
The default network configuration:
Port 5 on the switch controller is the internal interface talking to the CPU and detected as eth0. It requires configuration through admcfg and vconfig, and is useless without vlan tagging.
|
eth0: Broadcom BCM47xx 10/100 Mbps Ethernet Controller 3.50.21.10 |
The DMZ led will light when booting and turns off when the system is loaded.
View the kernel dmesg log here.
Tutorials:
Device information:
This is the second unit I bought to use at home. I got it in mid-April 2005 and it's running OpenWRT experimental. The ethernet controller is eth0 and the wireless controller eth1.
The default network configuration:
Port 5 on the switch controller is the internal interface talking to the CPU and detected as eth0. It requires configuration through admcfg and vconfig, and is useless without vlan tagging.
|
eth0: Broadcom BCM47xx 10/100 Mbps Ethernet Controller 3.60.13.0 |
The DMZ led will light when booting and turns off when the system is loaded.
View the kernel dmesg log here.
On Buffalo units make a copy of the settings using the "Save/Restore" function and take a note of the "System Information" page. You don't need to do a master reset the router to flash it, just use the LAN IP address already assigned when connecting with tftp.
If you have a Linksys WRT54G use the ping.asp exploit to enable the boot_wait setting. On the Buffalo unit I have it was already enabled per default. This will allow you to tftp over a newer firmware at bootup before the operating system is loaded if you experience failure or problems.
To enable the boot_wait on Linksys units, first configure the WAN interface or you'll get a "Network unreachable" error regardless of what you try (Use static 192.168.10.1/255.255.255.0). Then perform the following commands by entering one line and press "Ping" each time.
|
;cp${IFS}*/*/nvram${IFS}/tmp/n |
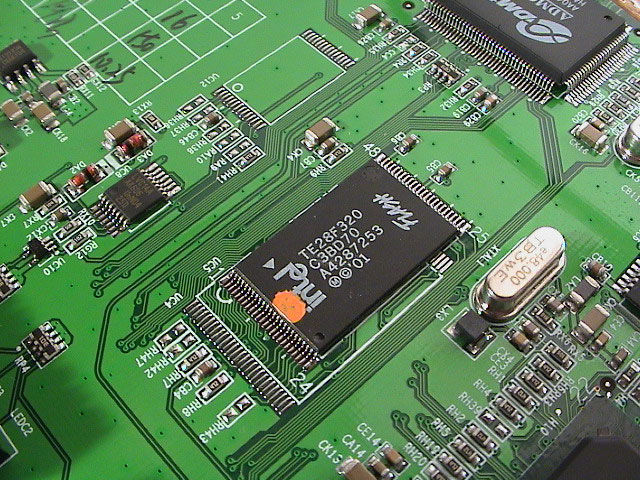
There's also a second method to trigger the tftp window by shortening two points on the flash chip. Crack open the unit using the disassembling guide and short pin 15 and 16 on the flash memory while powering on the unit. You'll easily see which corner is pin 1 as they're marked 1, 24, 25 and 48. Use a small flat philips screwdriver or similiar to shorten the pins and make sure you don't touch anything else on the circuit board during the procedure. I used a paperclip but anything with a width of 1 mm should do it.
This will trigger a crc mismatch and it will bail out to the tftp server.
 |
 |
When the device is booting it first executes the boot loader, PMON, and if boot_wait is set to "on" in the NVRAM it waits a few seconds for incoming tftp downloads before proceeding with the firmware loading. This is called the tftp window. If boot_wait is off it will boot the firmware instantly and you can't upload anything. But if it stumbles accross CRC errors while loading the firmware it will fall back to tftp downloads automatically. You can provoke CRC erros by shortening to data lines on the flash chip as described above.
There are two ways to flash OpenWRT to the device, through the web-based administration or tftp. The latter is more recommended because you learn how to rescue your router if you lock yourself out or something else fails later on.
I chose to use the 'tftp' command-line client on Debian Linux instead of any Windows GUI clients. For me it's just easier and simpler.
If the Linux box isn't on the same network segment yet, add an alias to the NIC. Note the eth0:2 notation, it can be any number after the colon.
| ifconfig eth0:2 192.168.50.11 netmask 255.255.255.0 |
Download snapshot-20041201.tar.bz2 or newer from the daily openwrt snapshot directory and extract the openwrt-linux.trx file for non-Linksys routers and the operwrt-g(s)-code.bin for Linksys routers. Check the main page for any newer version or experimental releases. There are two filesystems, jffs and squashfs. Squashfs is using LZMA compression to make more space available to the user, jffs do not.
| tar jxvf snapshot-20041201.tar.bz2 |
The tftp flashing prodecure is this: start tftp client, set the tfp settings, enter the last put line but don't press enter yet, power off the router, power it on again and hit enter after about 1-2 second. A long transfer log of received and sent messages should fly by if you successfully hit the tftp window, if you didn't try again.
On Buffalo units you can connect to the LAN IP address you assigned with the regular firmware but for Linksys units you have to use the IP address 192.168.1.1. Seems like Buffalo's PMON boot loader is reading the IP address from the NVRAM but not Linksys'.
|
ivc@server:~$ tftp 192.168.50.1 |
The flash is now complete and the router is rebooting and then initializing the new firmware, shouldn't take more than a few minutes. Do not power off the unit, make sure you can connect to it first.
If you later want to update to a newer OpenWRT firmware you can either use tftp at the boot_wait window or use mtd. Note that mtd expects a TRX file, remove the header to make it a TRX file.
|
mtd -r write openwrt-brcm-2.4-squashfs.trx linux (you might want to add '-e linux' to erase the device before writing) |
You can hardly fit a firmware file on the available flash space so you should use the ramdisk (/tmp) instead. Transfer the file with wget or scp (dropbear).
For Buffalo units you can flash the original firmware back using both of the methods mentioned above, you just have to remove the first 34 bytes from the header make it a true TRX file, i.e. "HDR0" instead of "WBR-B11". Linksys firmwares can be tftp flashed without altering the header but it needs to altered to flash with mtd. Use dd or a hex editor to remove the header.
Note: flashing with tftp will not work with firmwares larger than 3,145,000 bytes in size.
Connect with telnet to the LAN IP address assigned before flashing the firmware and you should be dumped to a command-prompt, no login.
|
telnet 192.168.50.1 |
Check if the initializing is finished by checking the read-write status on the root "/" partition. Then it's finished it should be "rw" at the end if the line.
|
root@OpenWrt:~# mount |
Now the system is ready to be configured for your liking. Some stock commands that come in handy: route, ifconfig, uptime, top, vi, ps x, df -h, uname -r, nvram, logread.
The root "/" filesystem is basicly built using symbol links to the read-only firmware "/rom" partition. If you want to edit any of the files in the root partition you need to first remove the symbol link and then save the new file to the root partition. If you want to keep the content of the symbol linked file just copy it from the "/rom" partition after removing the symbol link and then edit it with vi. Example:
|
rm /etc/profile |
This file structure us used to save space and to create a failsafe mode. Also note that all files are compressed when they resist on the flash.
Here's a few vi commands.
|
press "i" - to enter edit/insert mode |
You likely want to run or configure various settings upon boot and it's really just to create a file, make it executable and name it so that it executes in the right order. All the scripts resists in the "/etc/init.d" directory.
To add a general hook that executes just before the final S99done script, make a script with a lower sequence number i.e. S90local.
|
root@OpenWrt:~# vi /etc/init.d/S90local press "i" and type: save and quit: |
Make it executable.
|
chmod 700 /etc/init.d/S90local |
Now the script will execute just right before the end of the boot procedure.
Note: Most daemons and server packages include their own boot scripts.
I had to add the default gw manually, seems like it didn't pick it up from the nvram gateway_manual parameter. It's probably a Buffalo only parameter.
When setting the wan_gateway parameter in nvram no routing is going through, it works only when it's added 'manually' in a boot script. Add this line to your boot hook (above).
|
route add default gw xxx.xxx.xxx.xxx eth1 (xxx.xxx.xxx.xxx is your gw) |
The extra static routing entry I added through the Buffalo webpage was picked up correctly (static_route).
Static routes are handy if you have a large network or use multiple subnets. Upon boot the routes will be grabbed from nvram static_route and put through "route".
|
nvram set static_route=192.168.11.1:255.255.255.0:0.0.0.0:1:eth0 |
Before you can resolve any domain names and use ipkg with this device you need to set a working DNS server. It would normally be picked up from the wan_dns parameter but Buffalo is using dns_manual0/1 instead. Set the DNS server using the nvram command.
|
nvram set wan_dns=xxx.xxx.xxx.xxx xxx.xxx.xxx.xxx xxx.xxx.xxx.xxx |
You can also configure the regular /etc/resolv.conf file.
|
root@OpenWrt:~# vi /etc/resolv.conf press "i" and type: save and quit: |
If you want to name the device, set the wan_hostname. The name will show in the command-prompt after the 'at', i.e. root@wbr54g.
|
nvram set wan_hostname=wbr54g |
It's wise to use a more secure and better way to remote control your router than telnet. Replace telnet with a small package called dropbear, it's a ssh client and server.
Copy the content of /etc/ipkg.conf to /tmp and remove the symbol link as descriped above. Find the latest dropbear version in the official wrt package list. and copy the url string. Paste it into /etc/ipkg.conf and update ipkg list.
|
root@OpenWrt:~# vi /etc/ipkg.conf press "i" and paste the url string: save and quit: |
Get the new ipkg package list.
|
root@OpenWrt:~# ipkg update |
Install dropbear.
|
@OpenWrt:/# ipkg install dropbear |
Now start dropbear as described and try to connect from another computer. If all went well you can add it to the boot hook or create a new boot script. You can also remove the "/etc/init.d/S50telnet" boot script to disable telnetd from starting.
You may want to install a few other packages like iptraf, uptimeclient.
To simplify thing and make it more like my Debian systems I like to add a few aliases.
|
alias w=uptime |
The NVRAM is where the network and some system settings are stored. You can view or edit the parameters using the command nvram.
|
nvram show - show all |
A small summary of the important parameters can be found here.
There's no regular network config files in "/etc", it's all configured through nvram and/or 'manual' route/ifconfig commands. But most of the parameters are driver specific and not system specific.
Most of the parameters were described pretty well in the stock firmware and it's a good idea to make a complete mirror of the webpages using httrack for Windows or wget for Linux. The nvram parameter for the specific setting can be found in the source code of the webpages, usually after the "name=" tag.
If you locked yourself out or made a configuration error you can load failsafe and only the default OpenWRT firmware will be loaded. The LAN IP address to telnet is 192.168.1.1, regardless of the nvram parameters.
Trigger the failsafe by holding the reset button just after powering on, wait for diag led to light up, release the button after about 10 seconds. Technically the router will wait 1 second after the diag is lite and then check the status of the reset button. If you have boot_wait enabled it will take additional 5 seconds before the diag lights. When the OpenWRT is finished booting the diag led will turn off.
You can do maintaince on th jffs2 user partition by mouting it with these commands.
|
mtd unlock mtd4 |
If you want more secure or want to set up a adhoc network you will need to disable the br0 bridge. Set these parameters and reboot.
|
nvram set lan_ifname=eth0 (instead of br0) |
You can also disable it with the brctl command.
|
ifconfig br0 down |
Any masqurading between eth0 (LAN) and eth1 (WAN) will not be affected as per "/etc/init.d/S45firewall".
To enable the bridge again just reverse the process.
|
nvram set lan_ifname=br0 |
Or if you prefer the brctl command.
|
brctl addbr br0 |
If you already have a dhcp server running on your LAN you probably don't want a second server that messes everything up. Just comment one line in the /etc/dnsmasq.conf file.
|
root@OpenWrt:~# vi /etc/dnsmasq.conf |
Reboot or restart the dnsmasq daemon.
|
killall dnsmasq |
asd
You can turn up the TX power from the default 28 mW to 84 mW to increase range and signal strength, but it's NOT recommended to set it too high because many report heat problems and it will probably die after a few month. The Ewrt distribution is using 56 mW instead and they've been running stable for 9 months without problems. Try small increases at a time, i.e. 35, 40, 50 mW, and stop when you're satisfied with the signal strength (not more than 56 mW).
This is a small list how the system and driver automatically recognizes network settings. You can however use just plain old routing and configuration tools like route, ifconfig and wl.
The IP info on LAN port (vlan) can be configured using these parameters.
|
nvram set lan_ipaddr=xxx.xxx.xxx.xxx |
Likewise, use these parameters to configure the WAN port.
|
nvram set wan_ipaddr=xxx.xxx.xxx.xxx |
One or more of the values for the parameters is probably unused by OpenWRT since they're used specially for the stock firmware.
You need to install the pppoecd package and configure the settings below to get a functional DSL connection.
|
nvram set wan_ifname=ppp0 nvram commit |
You know the drill by now.
|
nvram set wifi_ifname=eth2 (if's not set after breaking the bridge) |
Setting all the nvram parameters can manually be tough and it might be easier to just flash back to the stock firmware, change the settings, flash back to OpenWRT and the system should recognize the changes. Or you could use more regular Linux configuration tools and put the commands in a startup script.
Also, don't use or set the wl_ nvram parameters, use the wl0_ instead.
If you disabled the wireless function in the regular firmware you can enable it again by setting wl_radio to 1. When it's disabled you'll only get "eth2 no wireless extensions." with iwconfig and generally have problems getting anything done with it.
|
nvram set wl0_radio=1 (1=enable and 0=disable) |
Per default the device is normally set to operate as an access point, but if you've configured it in client or adhoc mode you need revert back.
|
nvram set wl0_mode=ap (access point mode - master) |
If you have problems connecting make sure the access control list paramter is disabled, see below.
The similar iwconfig is this one, might not work that well though.
|
iwconfig eth2 mode master essid MY_LAN channel 6 |
This is the most common mode when connecting to a access point as a client.
|
nvram set wl0_mode=sta (station mode) |
The iwconfig command would look like this.
|
iwconfig eth2 mode managed essid MY_LAN channel 6 |
To only link together two wireless machines, use Ad-hoc. Set the same SSID and IP range on both machines and it should be ready to perform.
You might need to disable the brigde before creating or joining an ad-hoc network, read above.
To join set the following parameters.
|
nvram set wl0_mode=sta (station mode) |
And to create. Note that there is a problem setting wl0_mode=ap and wl0_infra=0 together to make it discoverable on the other machine, therefore forcing wl to use AP mode seems to work.
|
nvram set wl0_mode=ap (to clear any old adhoc configuration) |
As a side note, it's possible to do the same configuration with iwconfig but the problems still presist regarding old configurations.
|
iwconfig eth2 mode ad-hoc essid MY_ADHOC channel 6 |
WDS is really only a wireless bridge to another access point while simuntaniously serving wireless clients. It can be used to build a grid of access points and route the clients traffic to another access point nearby. This makes it easy to install an access point where no wired connection exists. Two or more access points can create a WDS network.
When adding an access point to a WDS network, a new virtual interface will be created. By setting up the correct routing tables you can send the traffic coming in from the clients through this interface.
To enable WEP on the access point you need to set a few parameters. I found these on the "ad-lan-wireless_sec_g.htm" page from the stock Buffalo firmware.
|
nvram set wl_wep=restricted (-1=off, restricted=wep and a few others) |
Below is a guide to set-up WDS on Kamikaze 8.09.
You can enable WPA when WEP is already running. To disable WPA just set wl0_akm=open and reload. More information about configuration here.
|
ipkg install nas
nvram set wl0_akm=psk // wpa-psk |
On this Buffalo device when the MAC control list is set to "Allow All", the nvram wl0_macmode is "allow". The OpenWRT driver reads this value as "Allow association to stations on the MAC list" and not "Disable MAC address matching". Correct this by changing the nvram parameter.
|
nvram set wl0_macmode=0 |
To turn off SSID broadcasting set wl_closed to 1.
|
nvram set wl_closed=1 (1=deny and 0=allow) |
After you've done all the changes you probably want to make a backup in case the file system corrupts or you forget to make a backup when upgrading the firmware.
I like to send the "/etc/ directory, install ipkg packages and a output of nvram over to another Linux server.
|
cd / |
Or you can make a tarball in "/tmp", there's enought space sine its RAM not FLASH, and send it over somehow.
|
cd /tmp |
All the 5 ports on the back of the unit is actually virtually tagged and managed by the ethernet driver and switching chip. Here is how to split them:
|
old version: |
X-Wrt is an extended GUI for OpenWRT. It's like DD-WRT but with the OpenWRT back-end. The X-Wrt instllation guide will show a lot of un-necessary details, below is the essential commands needed to install X-Wrt ontop of OpenWRT White Russian 0.9. Currently the WBR-G54 is not compatible with the new OpenWRT Kamikaze releases (interface mess-up), White Russian 0.9 is the latest stable.
Kamikaze is the next release after White Russian and one of the noticable changes is the much cleaner config system. No longer all the nvram mess, but real config files in /etc/config and an interface tool called uci to manage the settings quickly.
Currently there is no good usable Broadcom Wifi driver for kernel 2.6 and Kamikaze for Broadcom based routers (WRT54*, etc) is based on kernel 2.4.
Flash the router through the regular web interface, telnet to 192.168.1.1, type passwd to set a password, type reboot and use a SSH client (ssh, putty, etc) to connect to 192.168.1.1.
One thing I've learned from previous setups and modifications is that backup of the default settings, and more importantly, working settings is a must.
|
# Backup CFE (Common Firmware Environment) |
Not all the NVRAM, actually at all the many, of the settings are needed in Kamikaze. Clean it using a handy script from openwrt.org (look through it first). It will also show the before and after size. Details
|
cd /tmp |
It's possible to use the GPIO lines used for the LEDs and front buttons to add a SD card via SPI mode. Only 4 points in additional to power and ground needs to be soldered.
#wrt54g IRC LOG [openwrt.org]
Your Source For the WRT54G [wrt54g.com]
HyperWRT [hyperdrive.be]
OpenWRT [openwrt.org]
Community LAN Software [dailywireless.org]
Hacking a Wireless Access Point [pisarsky.com]
LinksysWrt54g Wiki [seattlewireless.net]
frottle - Packet Scheduling [sourceforge.net]
Void Main's Linksys WRT54G Revival Tip [is-a-geek.net]
GettingStartedTips [openwrt.org]
OpenWRT RTFM [openwrt.org]
WBRG54 Thread [openwrt.org]
WBR-G54 Wiki [seattlewireless.net]
AODV on Linksys [ucsb.edu]
Turning WRT54G into a WaFreenet node [penguincare.com.au]
OpenWRT NVRAM [openwrt.org]
Jim Buzbee's Linux on WRT54G [batbox.org]
iwconfig vs wlconf vs wl [openwrt.org]
Advanced Wireless with Linux [sorgonet.com]
Linksys WRT54G on a Steriod Diet [ust.hk]
SIPatH Documentation Wiki [sourceforge.net]