
It's essential to make a good and proper connector to avoid losing a lot of signal power in the connector.
I'm going to show a solder N female connector manufactured by Tyco. Usually you can download the instructions in form of a PDF or similiar and most of the necessary numbers and figures to how to assemble the connector are included.
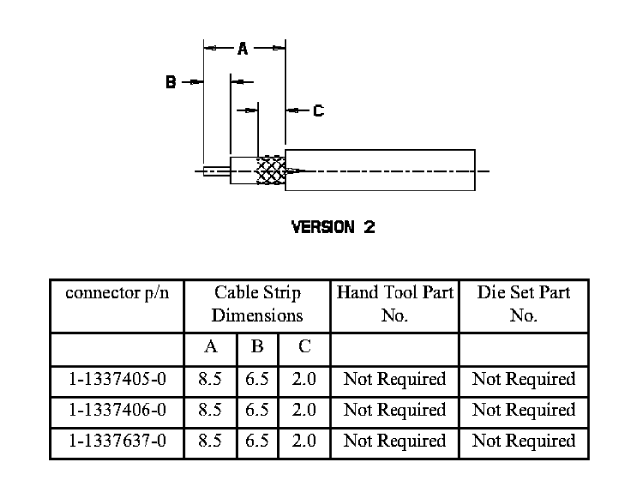
Cable Assembly Instruction Sheet
These two pictures are all you need to assembly the connector according to Tyco's instructions.
|
|
|
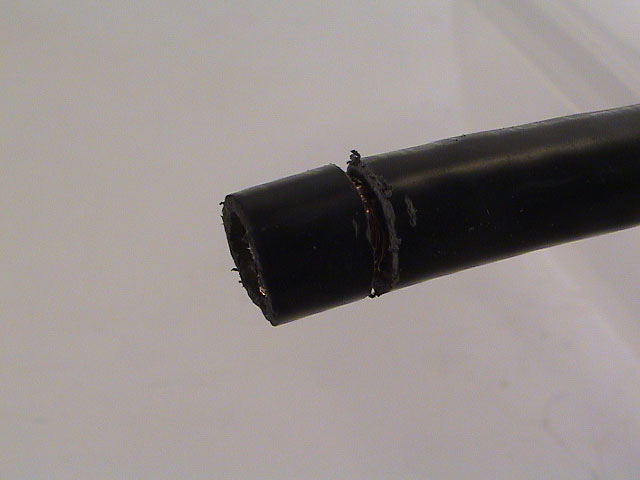
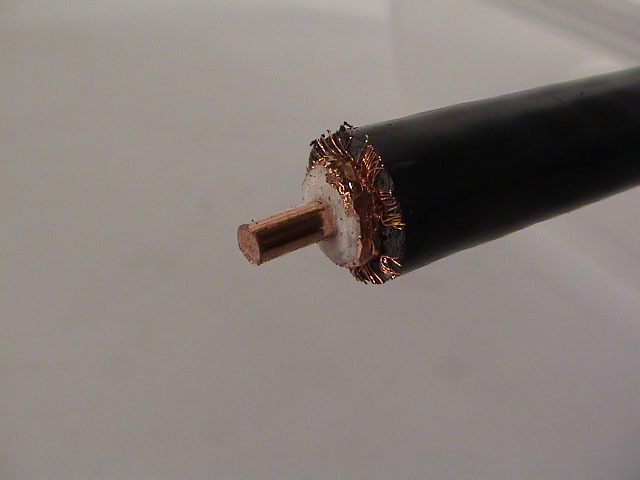
Remove 8 mm of the plastic sheath. Bend back the braiding and measure 2 mm from the sheathing to cut the dielectric.
 |
 |
 |
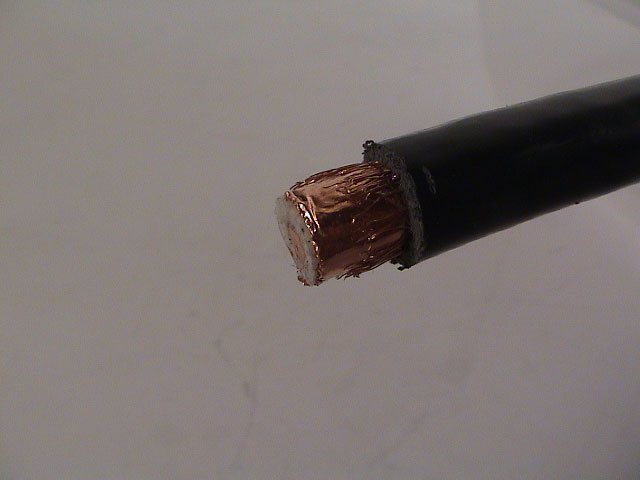
Remove the dielectic and align the brainding nicely around the cable radius. Cut the braiding 2 mm from the sheath. The sheath should be around 2 mm thick so you could use that to measure the length.
 |
 |
|
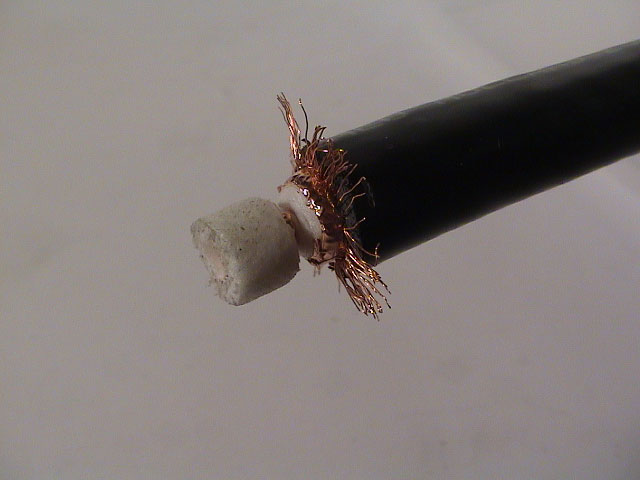
Now the cable is almost ready. Last thing to check is if the connector conductor fits the cable conductor. It should normally fit if you got a matching cable and connector, but if the store available to you don't carry the correct parts you could modify it to fit.
I had to file down the conductor a 1/2 mm to make it correctly.
 |
||
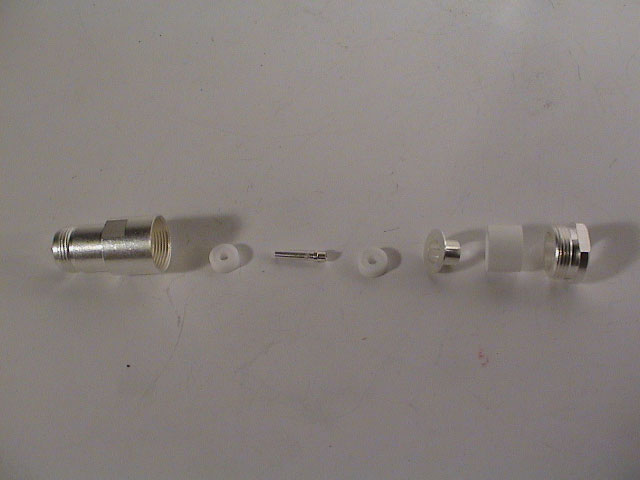
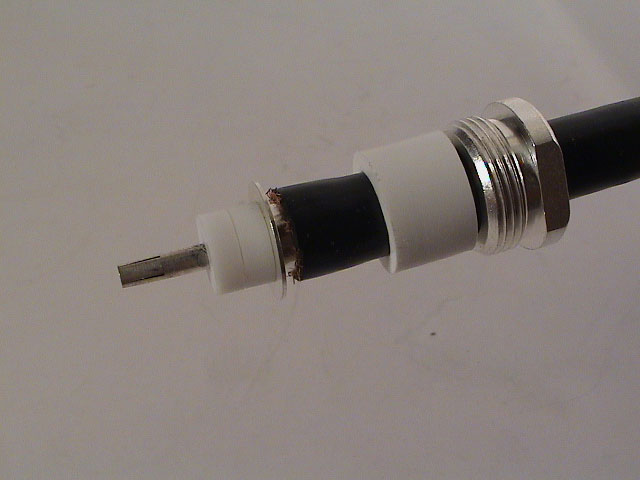
Line up the connector parts in the correct order and fit the first part like the nut and the gasket on to the cable.
 |
 |
|
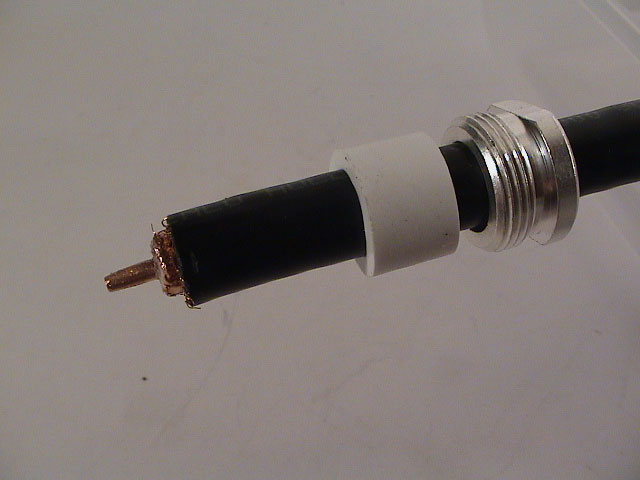
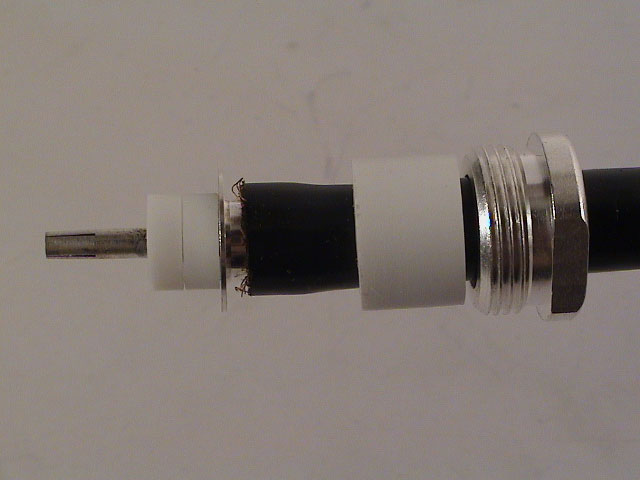
Take the sleeve hat and fit it between the dielectric and the braiding. Help it by pulling the braiding and sheath outwards. Since the braiding is bent over the sheath it shouldn't be dragged down with the sleeve.
The sleeve should align to the dielectric and not to the sheath. When the gasket is pressed by the nut, the sleeve will make a good connection between the braiding in the cable and the connector's inside.
 |
|
|
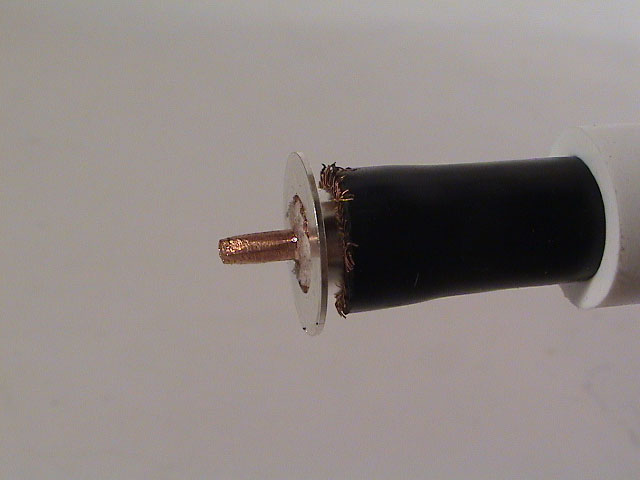
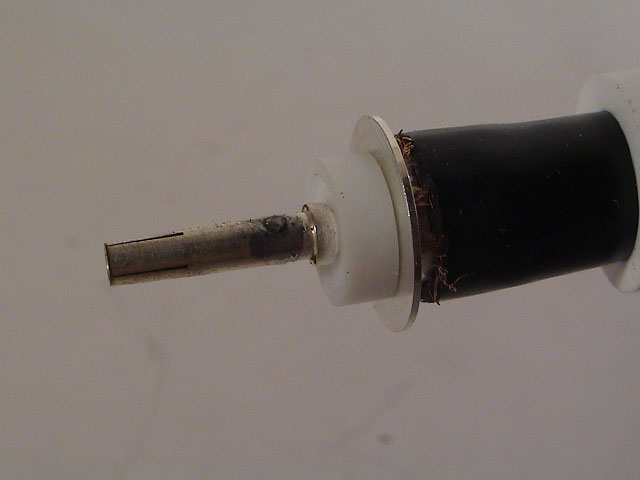
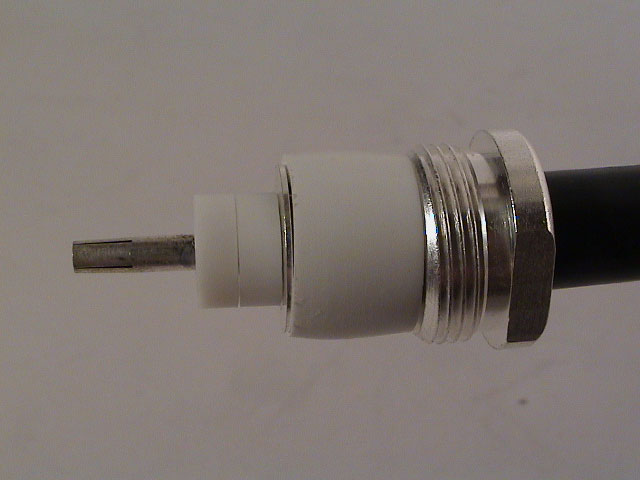
Tin the conductor to make a good electrical connection. Avoid burning or heating the dielectric too much. Attach the white insulation ring to the conductor, fit it to the cable conductor, heat it, supply solder into the small hole until excess solder pops out and remove the excess solder so that the last insulation ring fits.
 |
 |
|
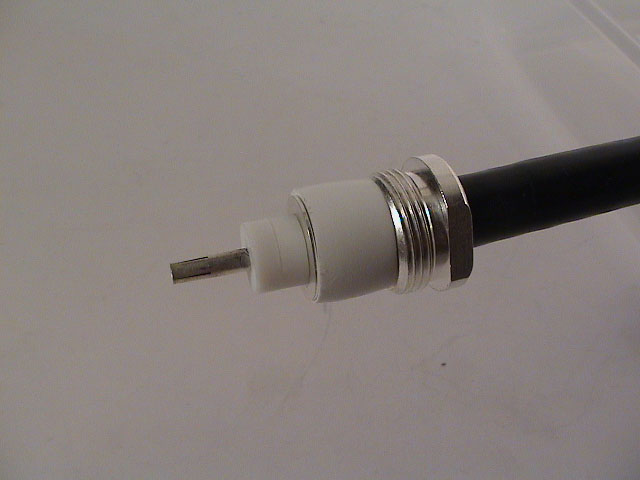
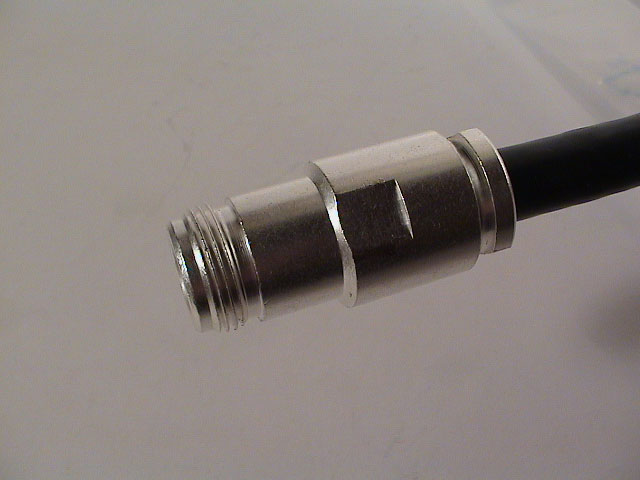
After attaching all the part it should look something like this.
 |
 |
 |
 |
||
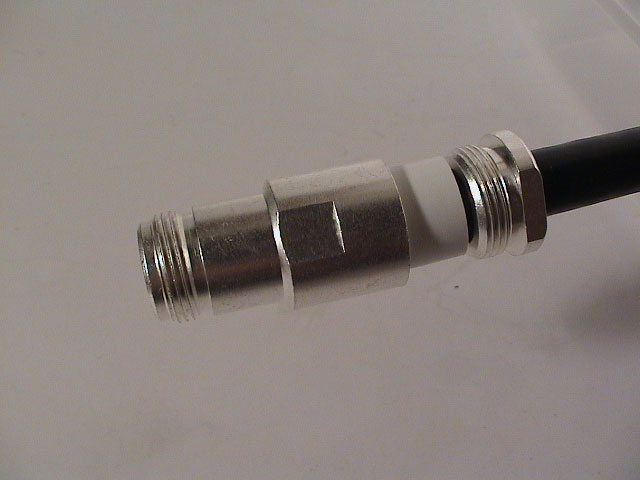
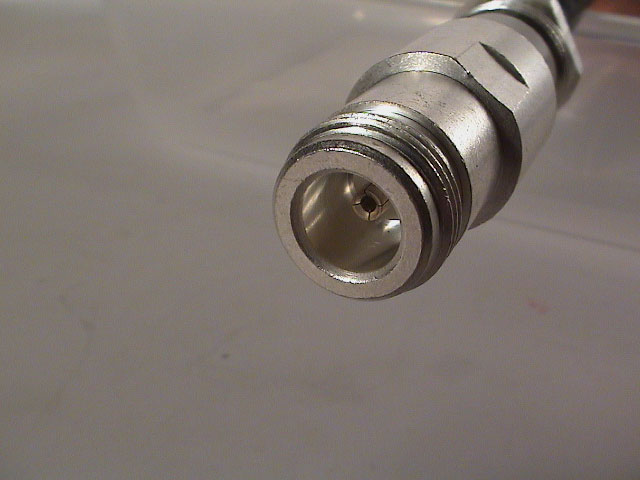
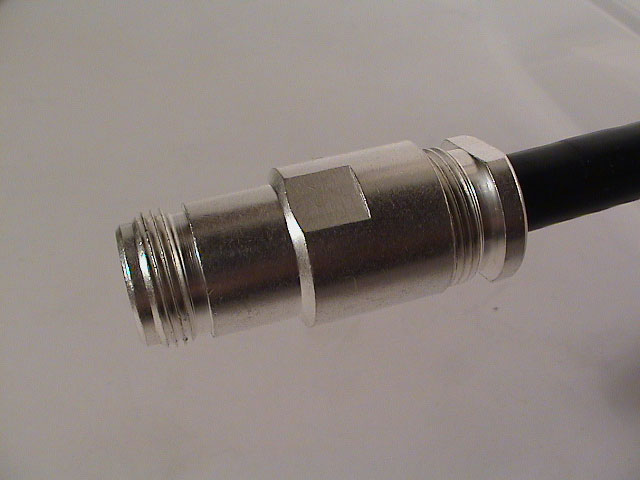
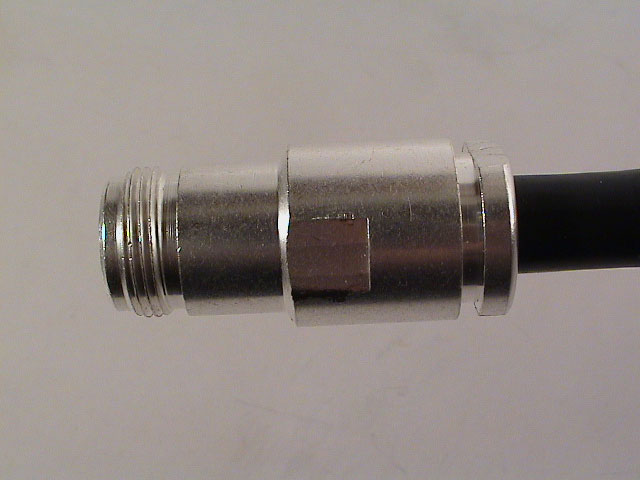
In the final assembly step, attach the connector body and screw the nut all the way till it stops.
 |
 |
 |
 |
 |
 |
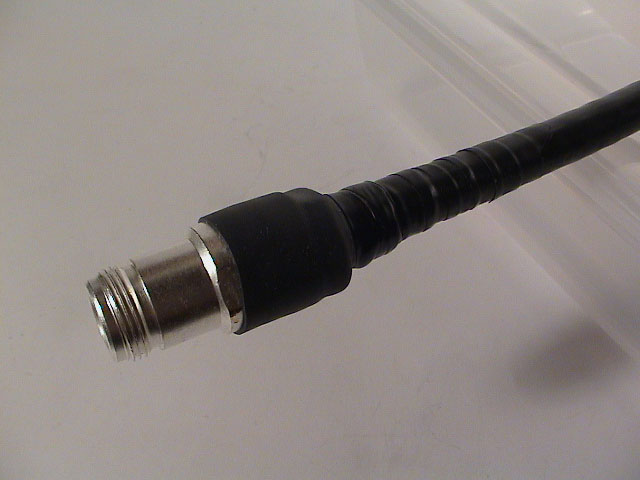
You might want to add some heat-shrinkable tubing to avoid water and dust exposure.
 |
||
N Female Solder Connector Sheet [pdf]